
Read your results
Everything on the right side of the calculator is your recipe. Here it is, card by card.
The main numbers and the drawing
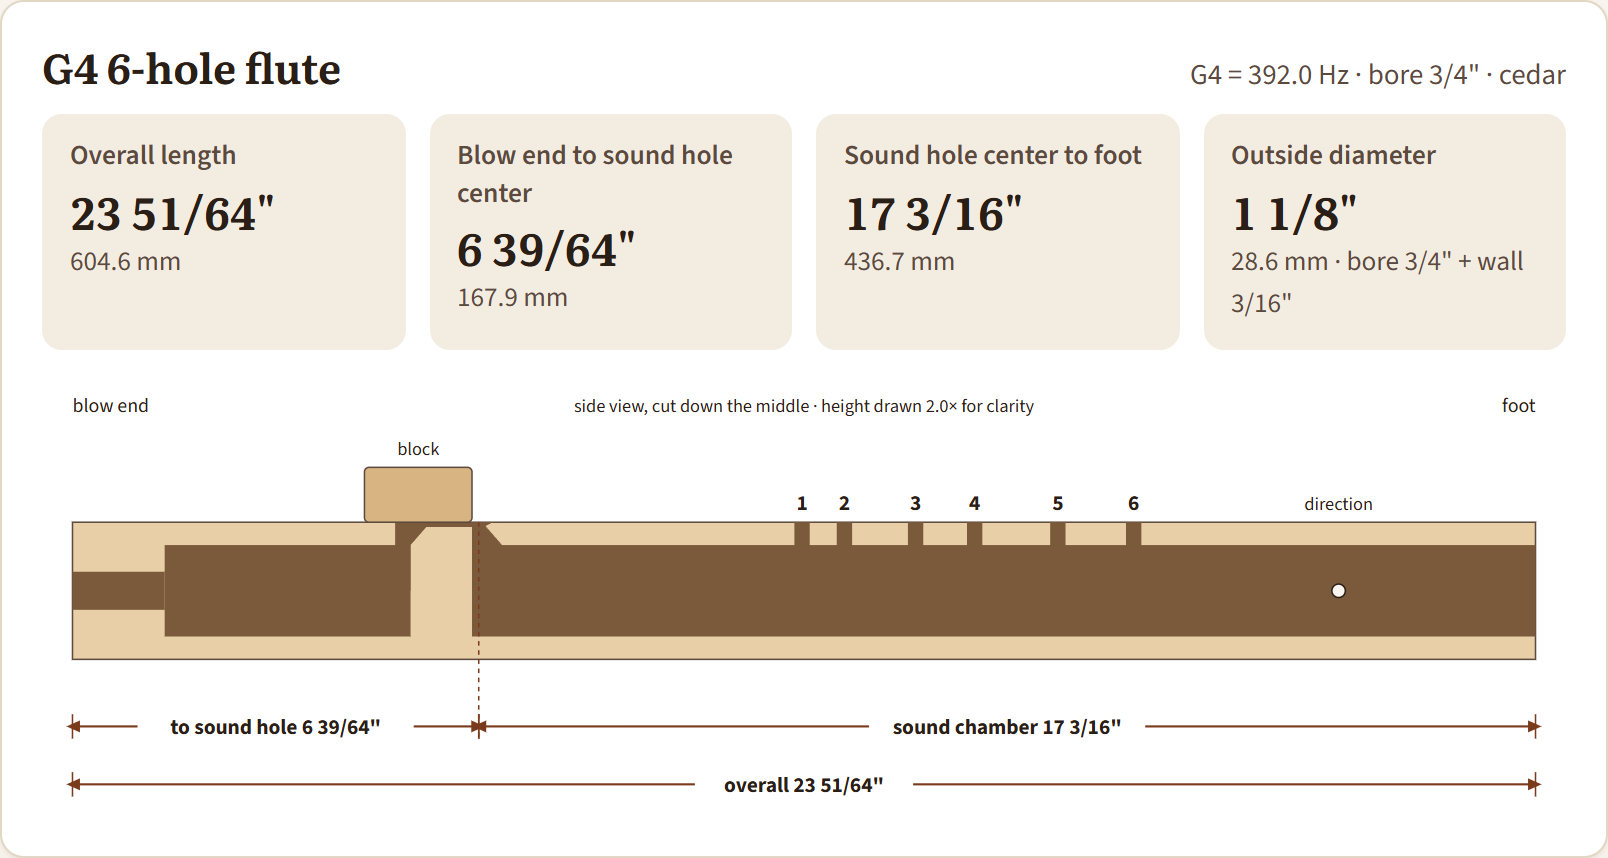
The top card gives the overall length, the distance from the blow end to the center of the sound hole, the sound chamber (sound hole to foot), and the outside diameter. The drawing is a side view of the flute cut down the middle, the same view the CNC cuts.
Finger holes
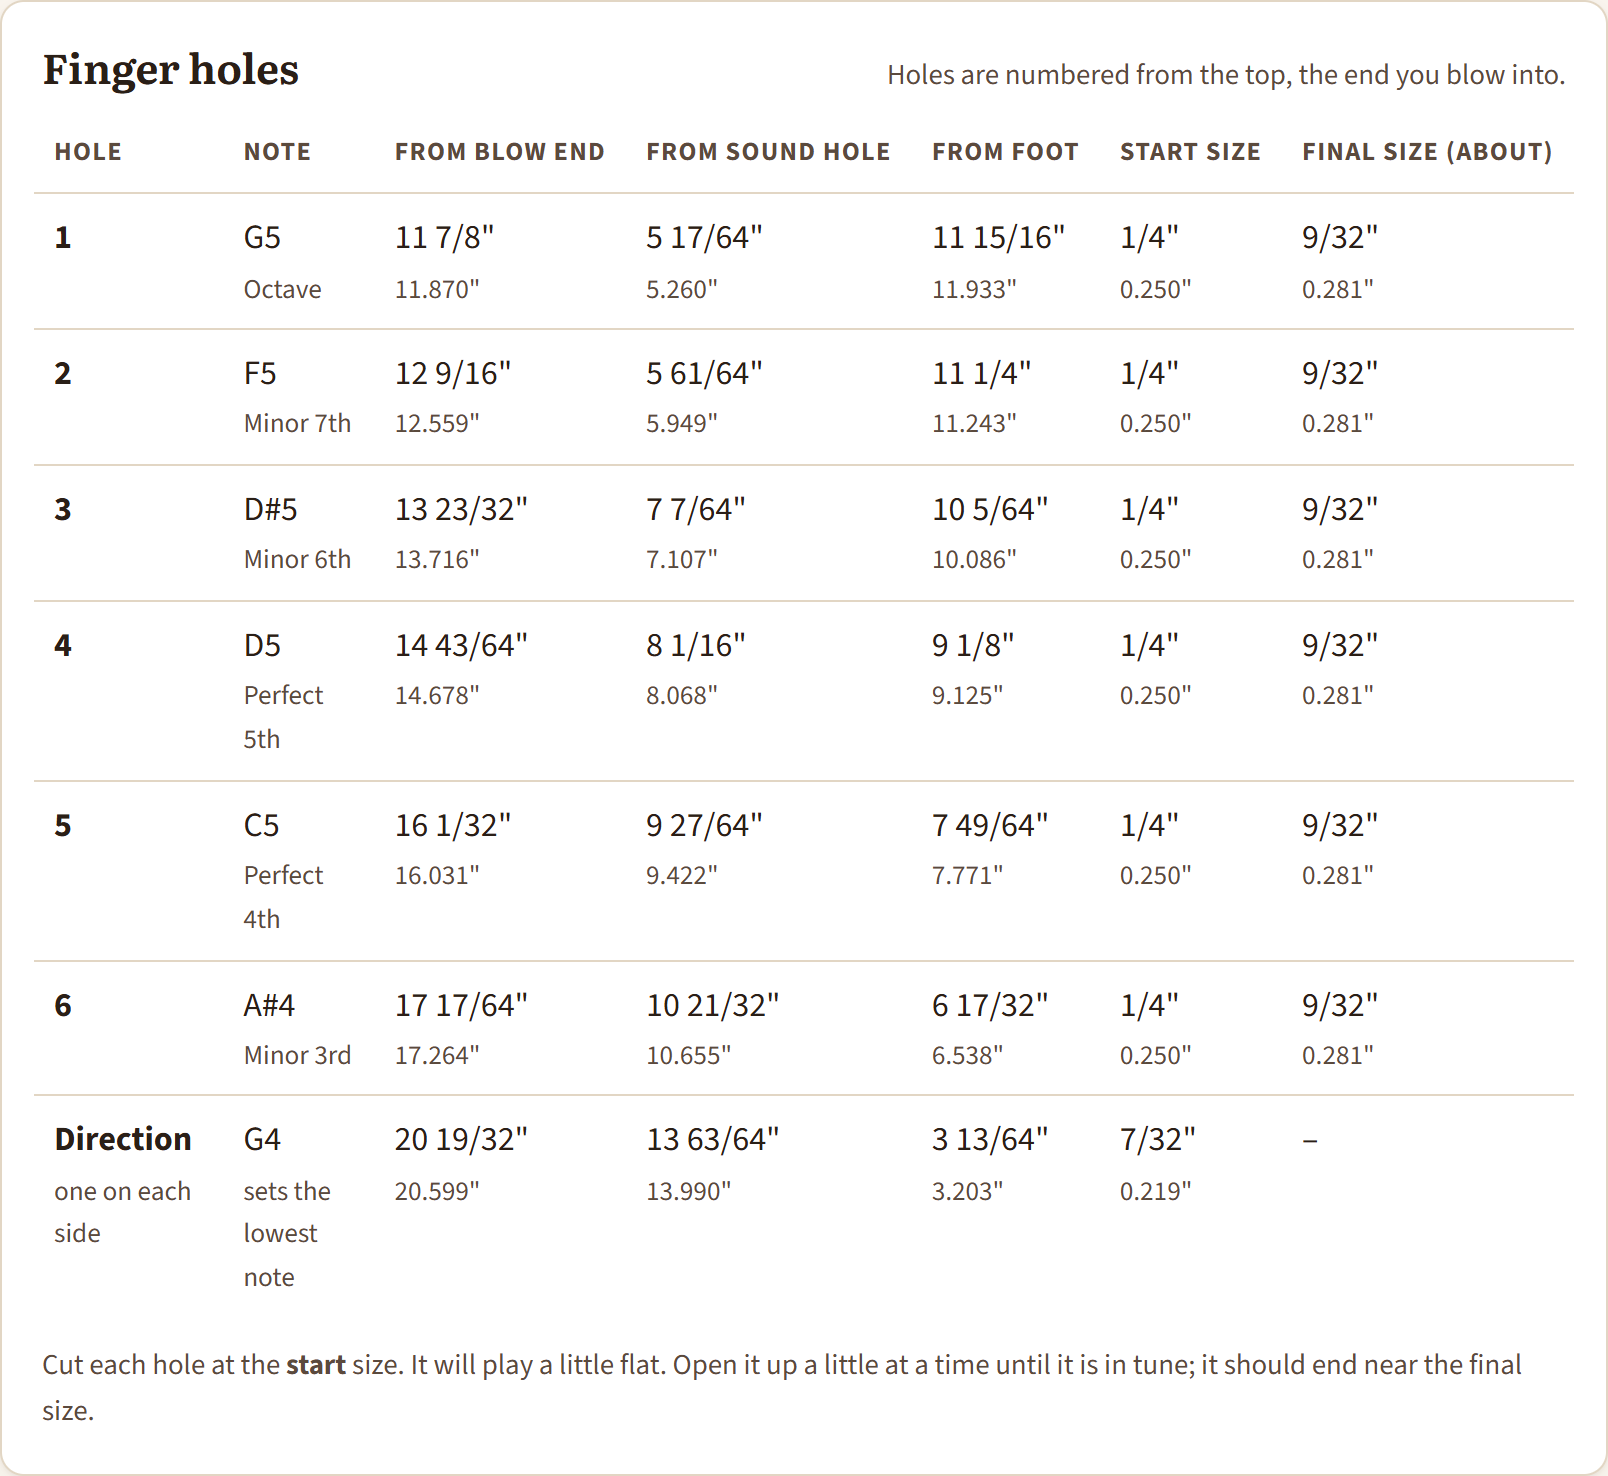
Each hole is listed from the top, measured three ways: from the blow end, from the sound hole and from the foot. Use whichever is easiest to measure from on your flute; the sound hole is the most accurate.
Start size is what you cut first. The hole will play a little flat. Open it up a little at a time until it is in tune; it should end near the final size.
Fingering chart
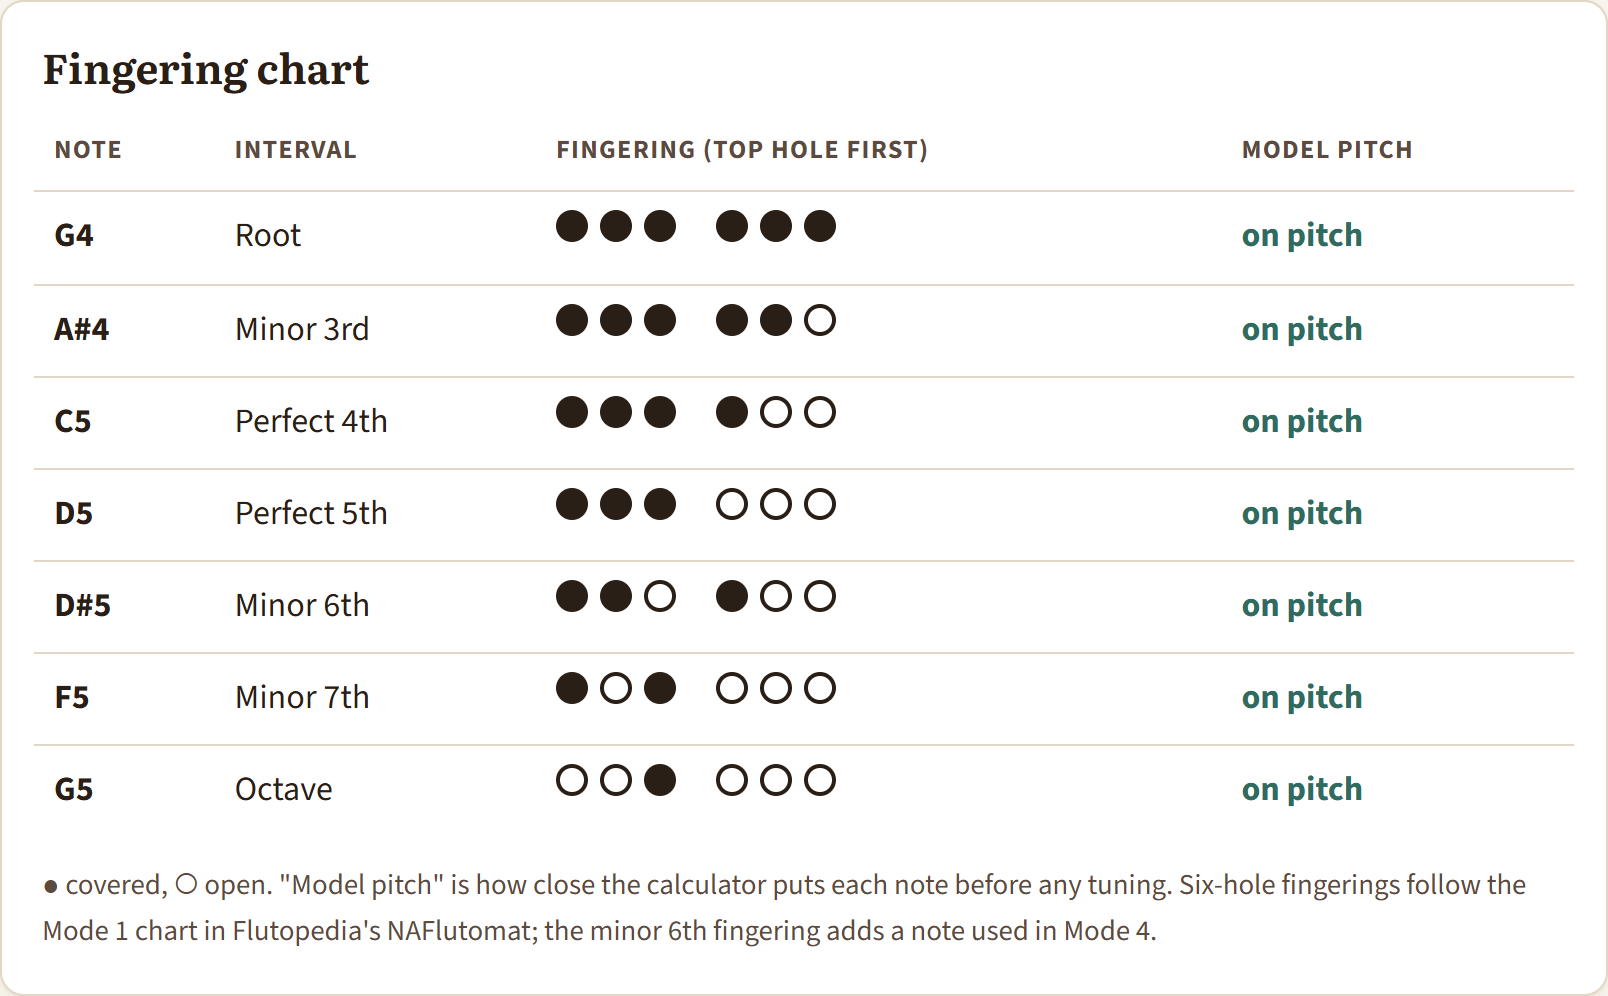
Filled dots are covered holes; open dots are open. "Model pitch" shows how close the calculator puts each note before tuning.
Sound hole, flue and chambers
A true-scale close-up of the sound mechanism with its angles, and a table of every part's size.
Checks
Green means every hole reaches its note and fits your hand. Orange and red notes say what to change and how.